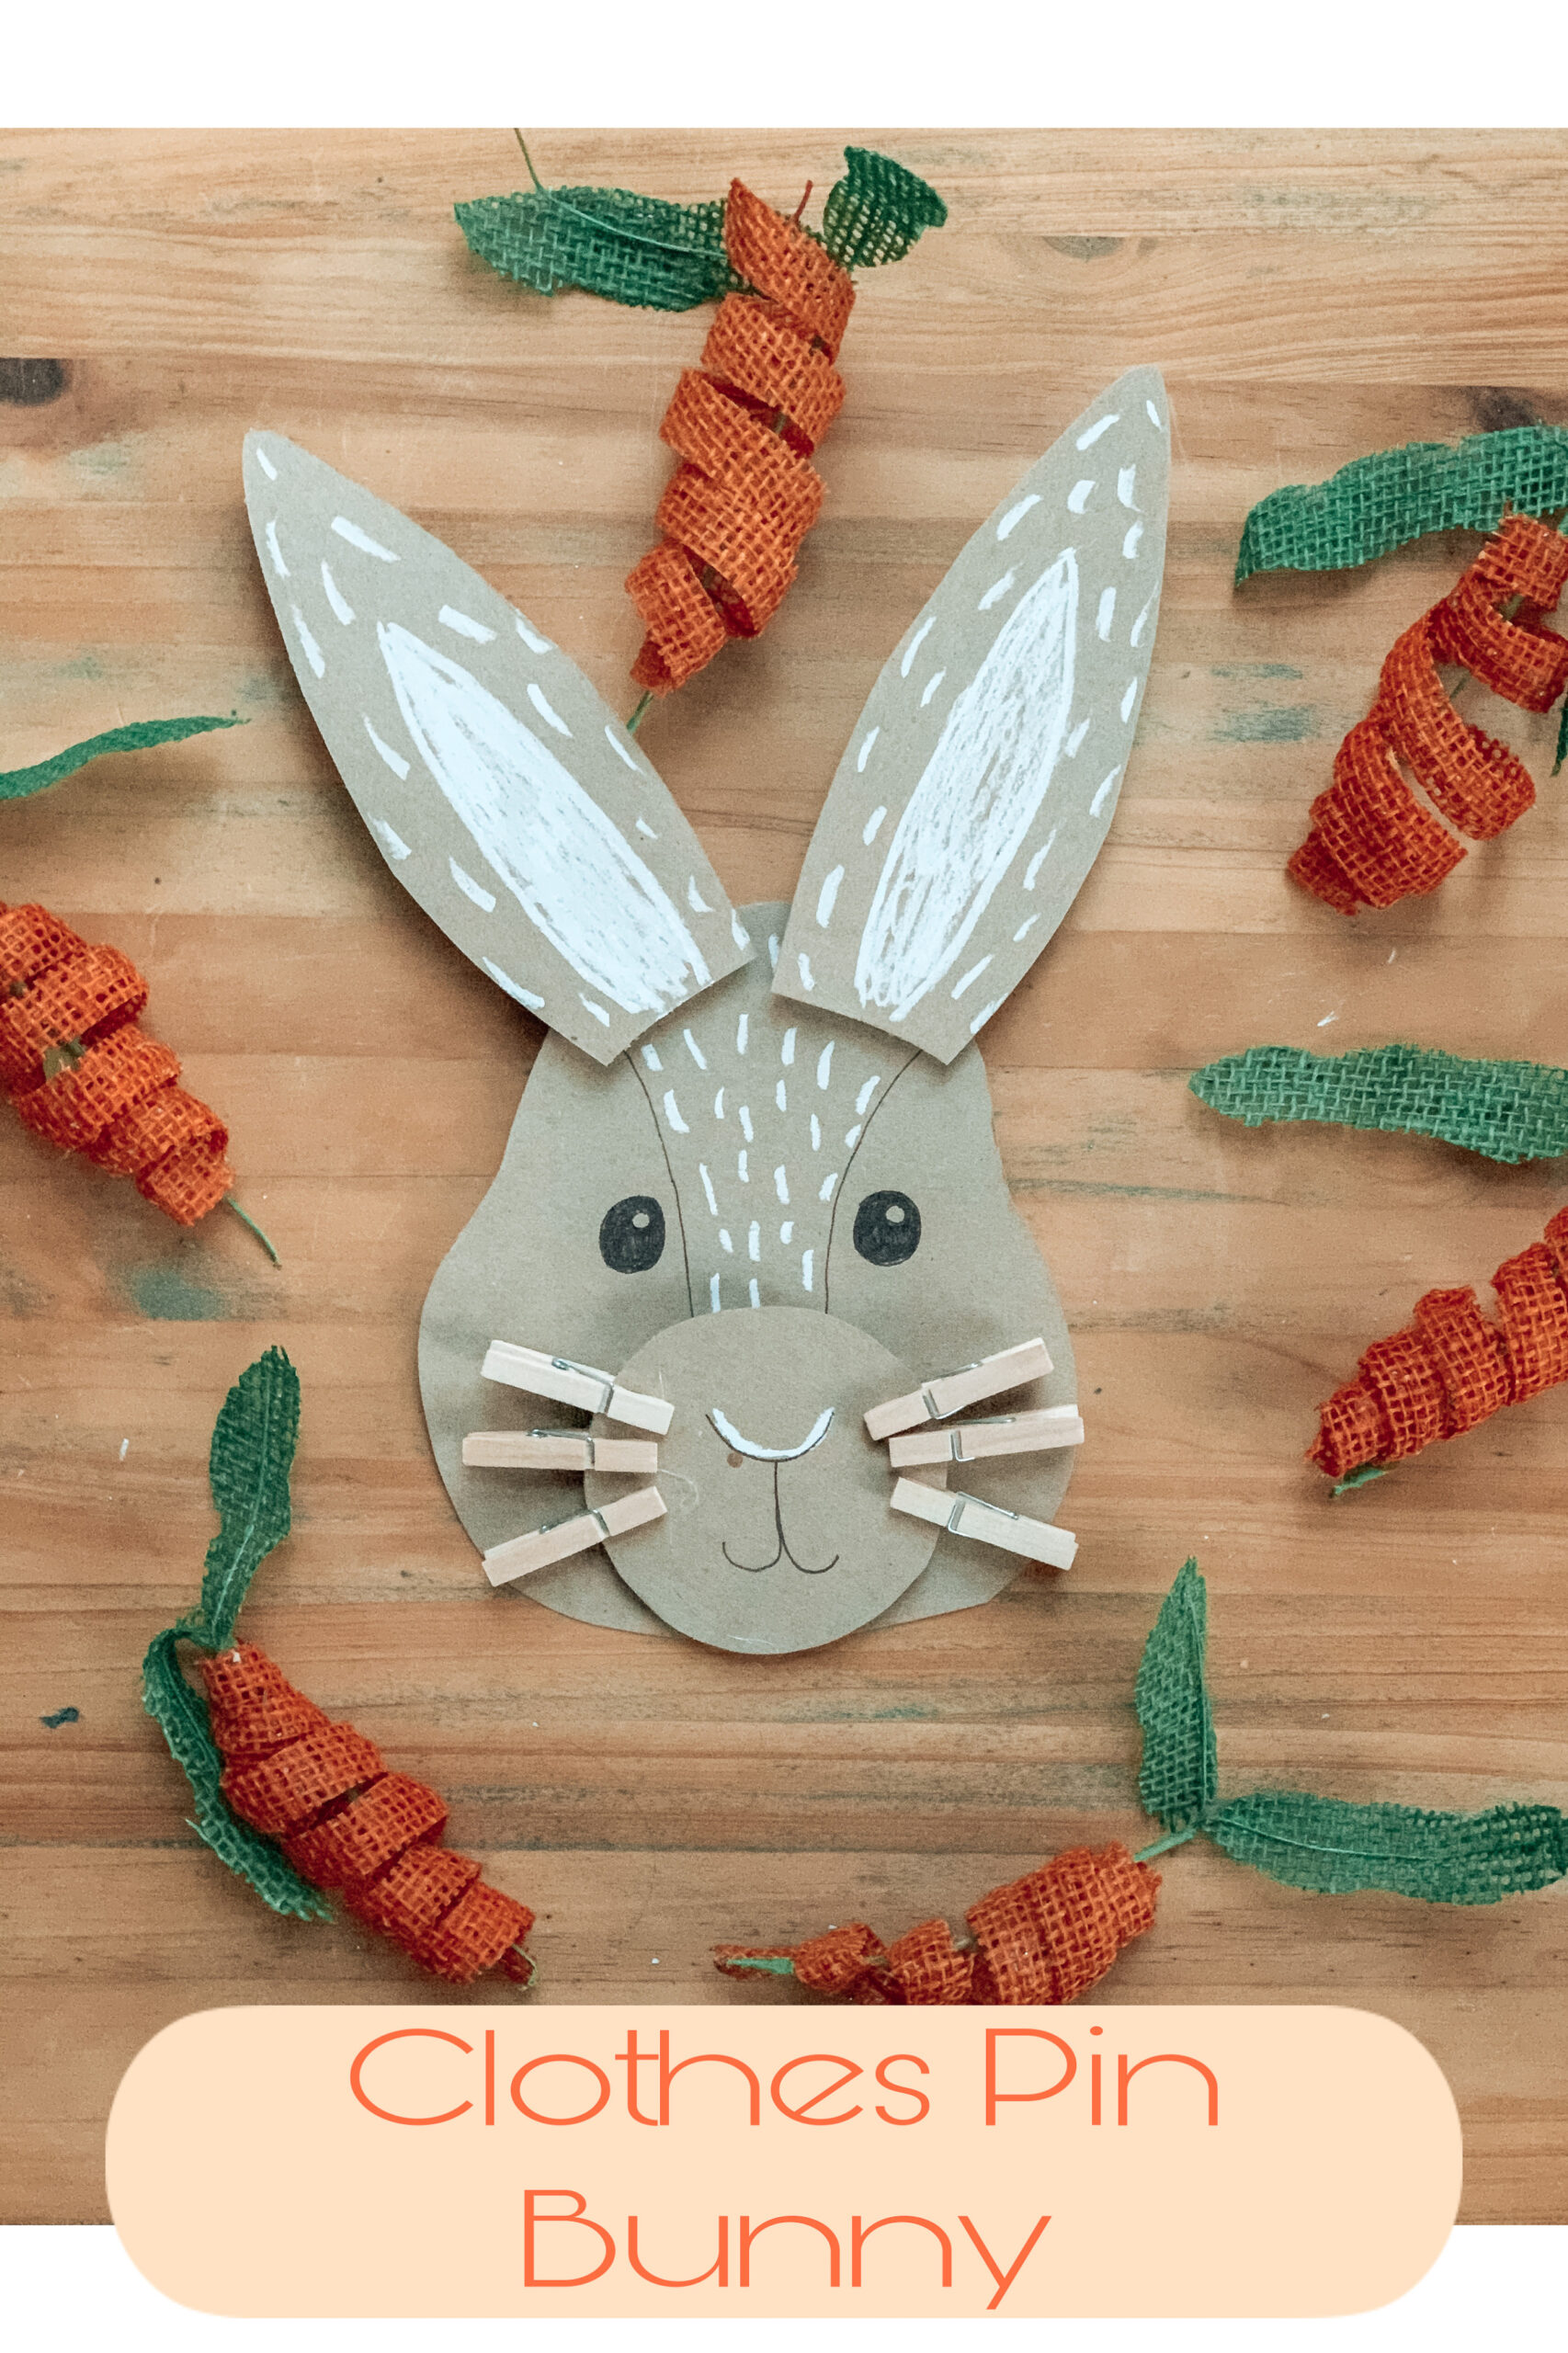

‘Tis the season for all things bunnies! This cute little clothes pin bunny is a great way to work on fine motor pinching skills. Fine motor skills are important to develop because they are involved in important functions such as writing, buttoning, zipping, and cutting.
How I Made This Clothes Pin Bunny:
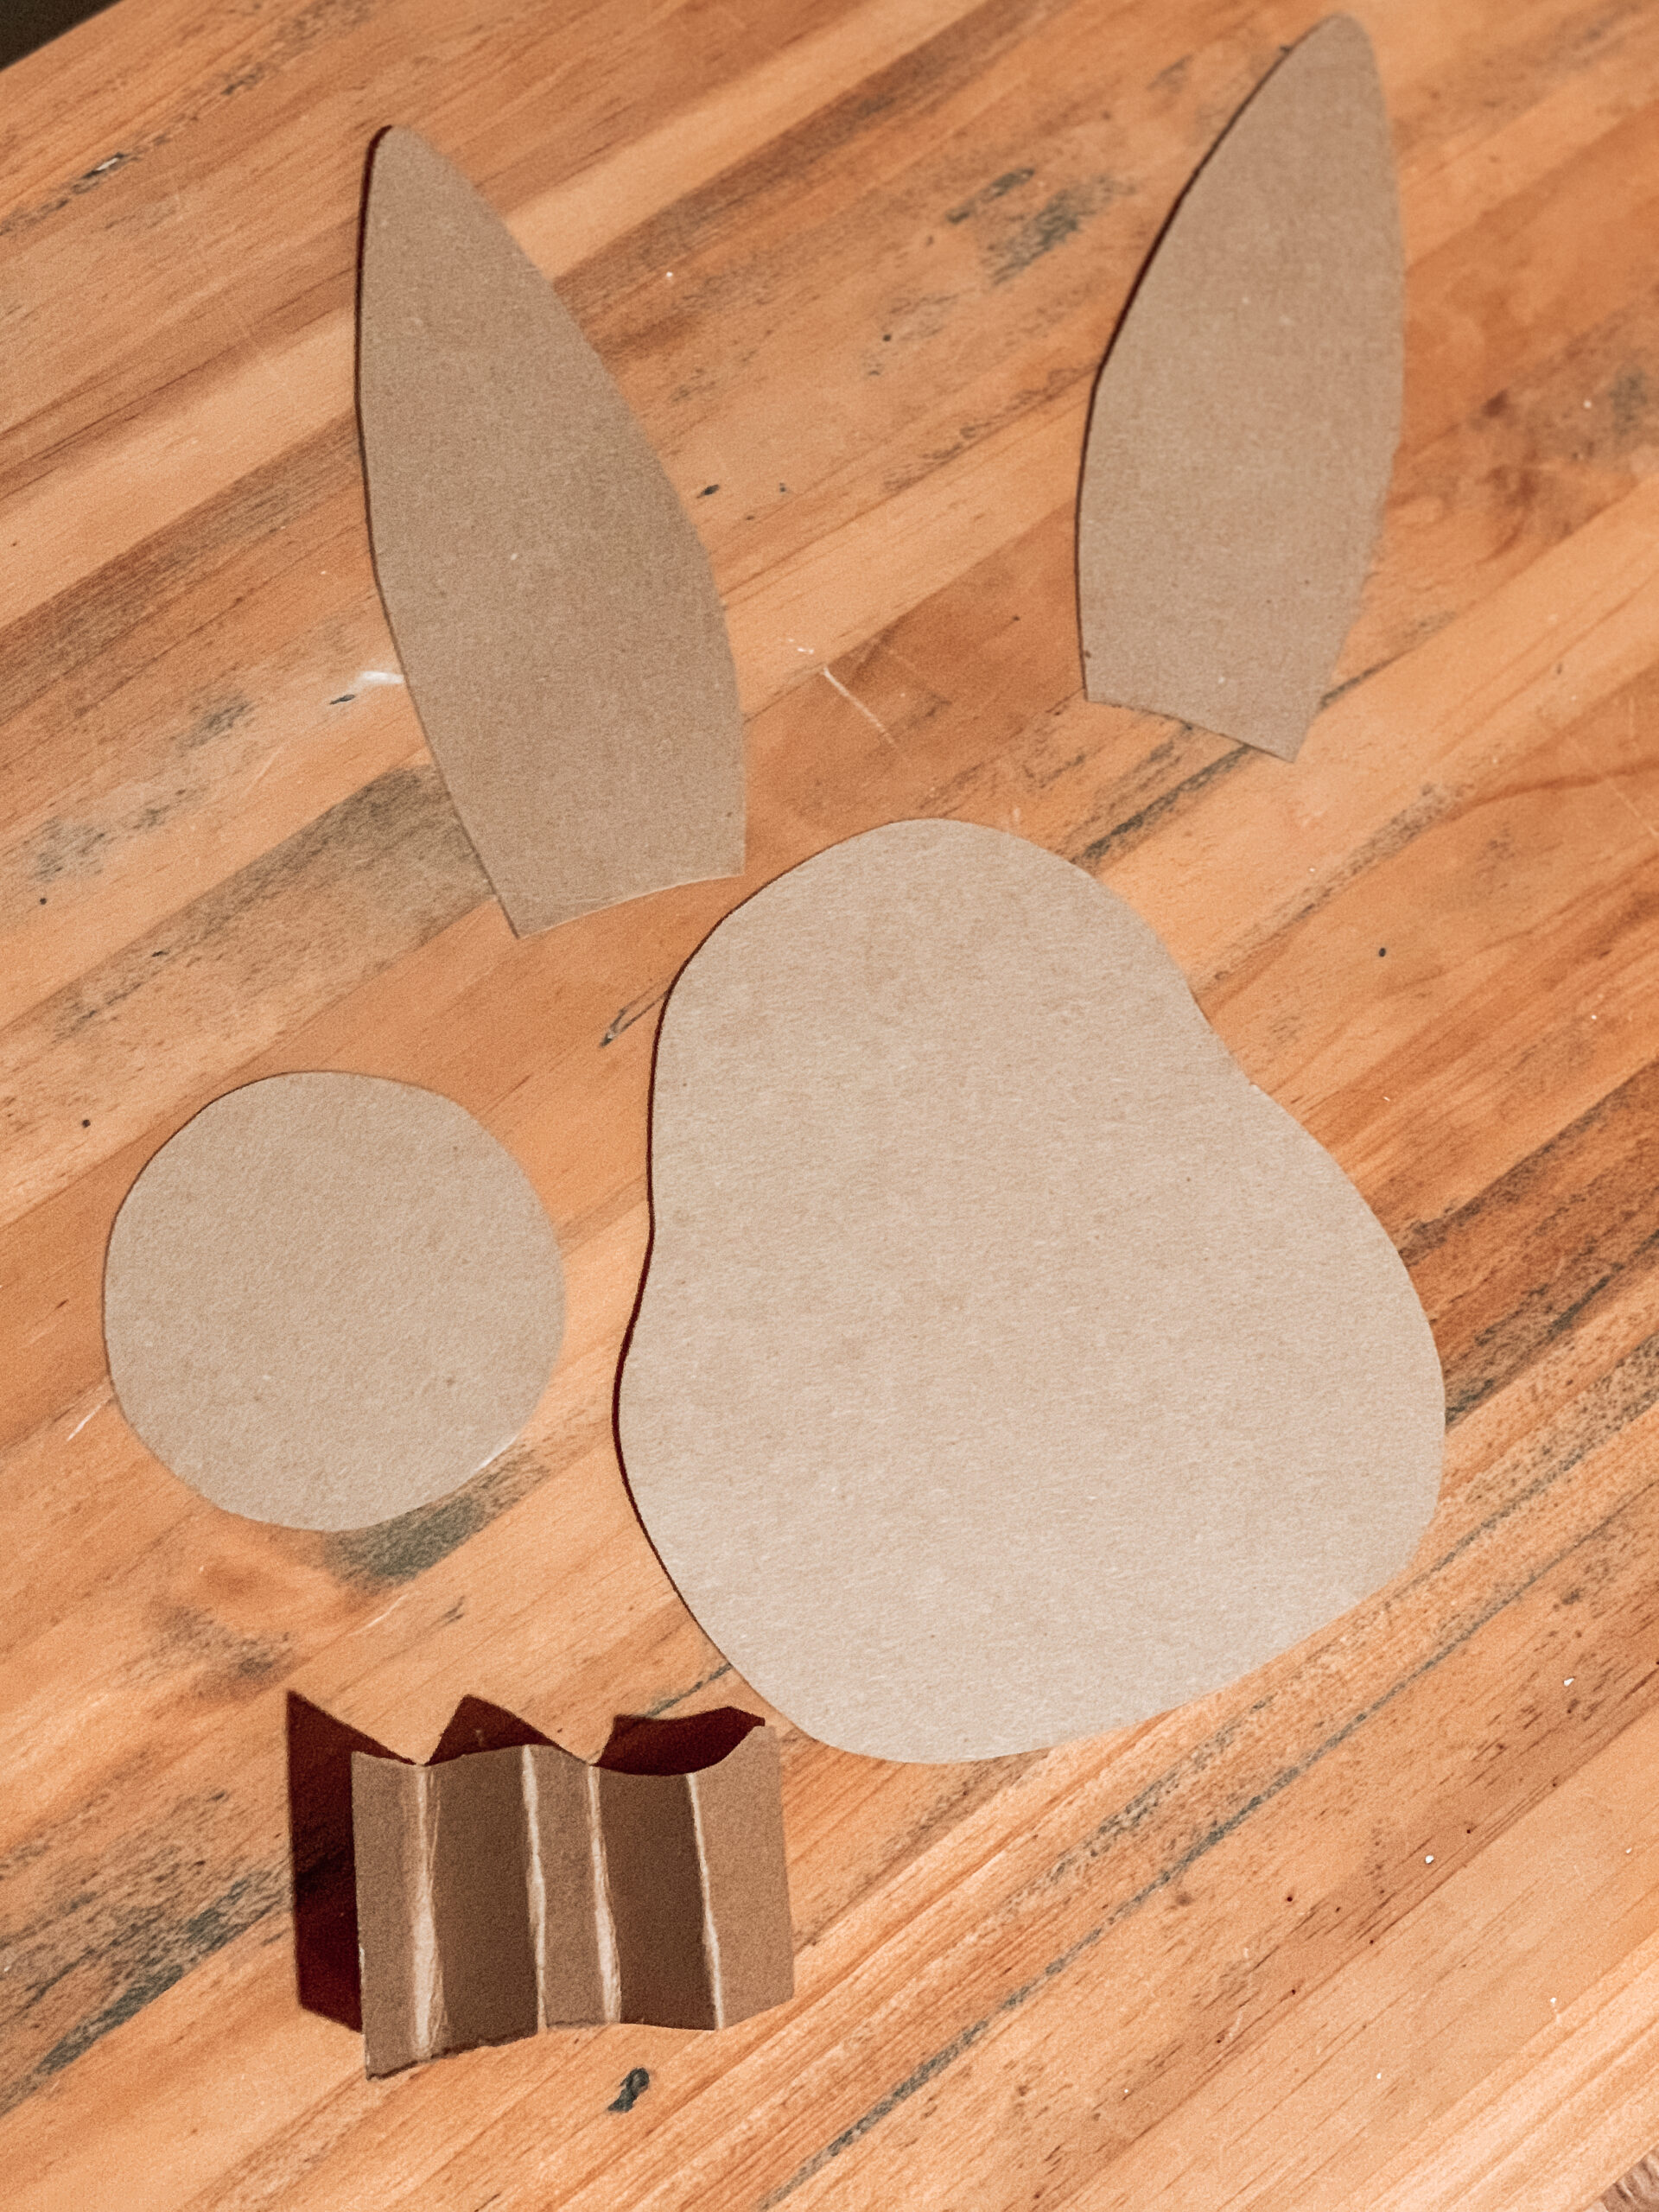
First, I started by cutting the shapes shown below out of a cardboard box. I used a cereal box for this project. I like using cereal boxes for crafts like this because they are thin and easy to cut out. The shapes below are: two ears, a face, a circle nose, and rectangle folded like an accordion (the rectangle is used to prop up the nose on the bunny face). After folding the rectangular piece of cardboard like an accordion, I hot glued all of the folds together resulting in more of a rectangular block than an accordion.
After cutting out all of the pieces I used a white chalk marker and a thin black sharpie pen to add the decorative details.
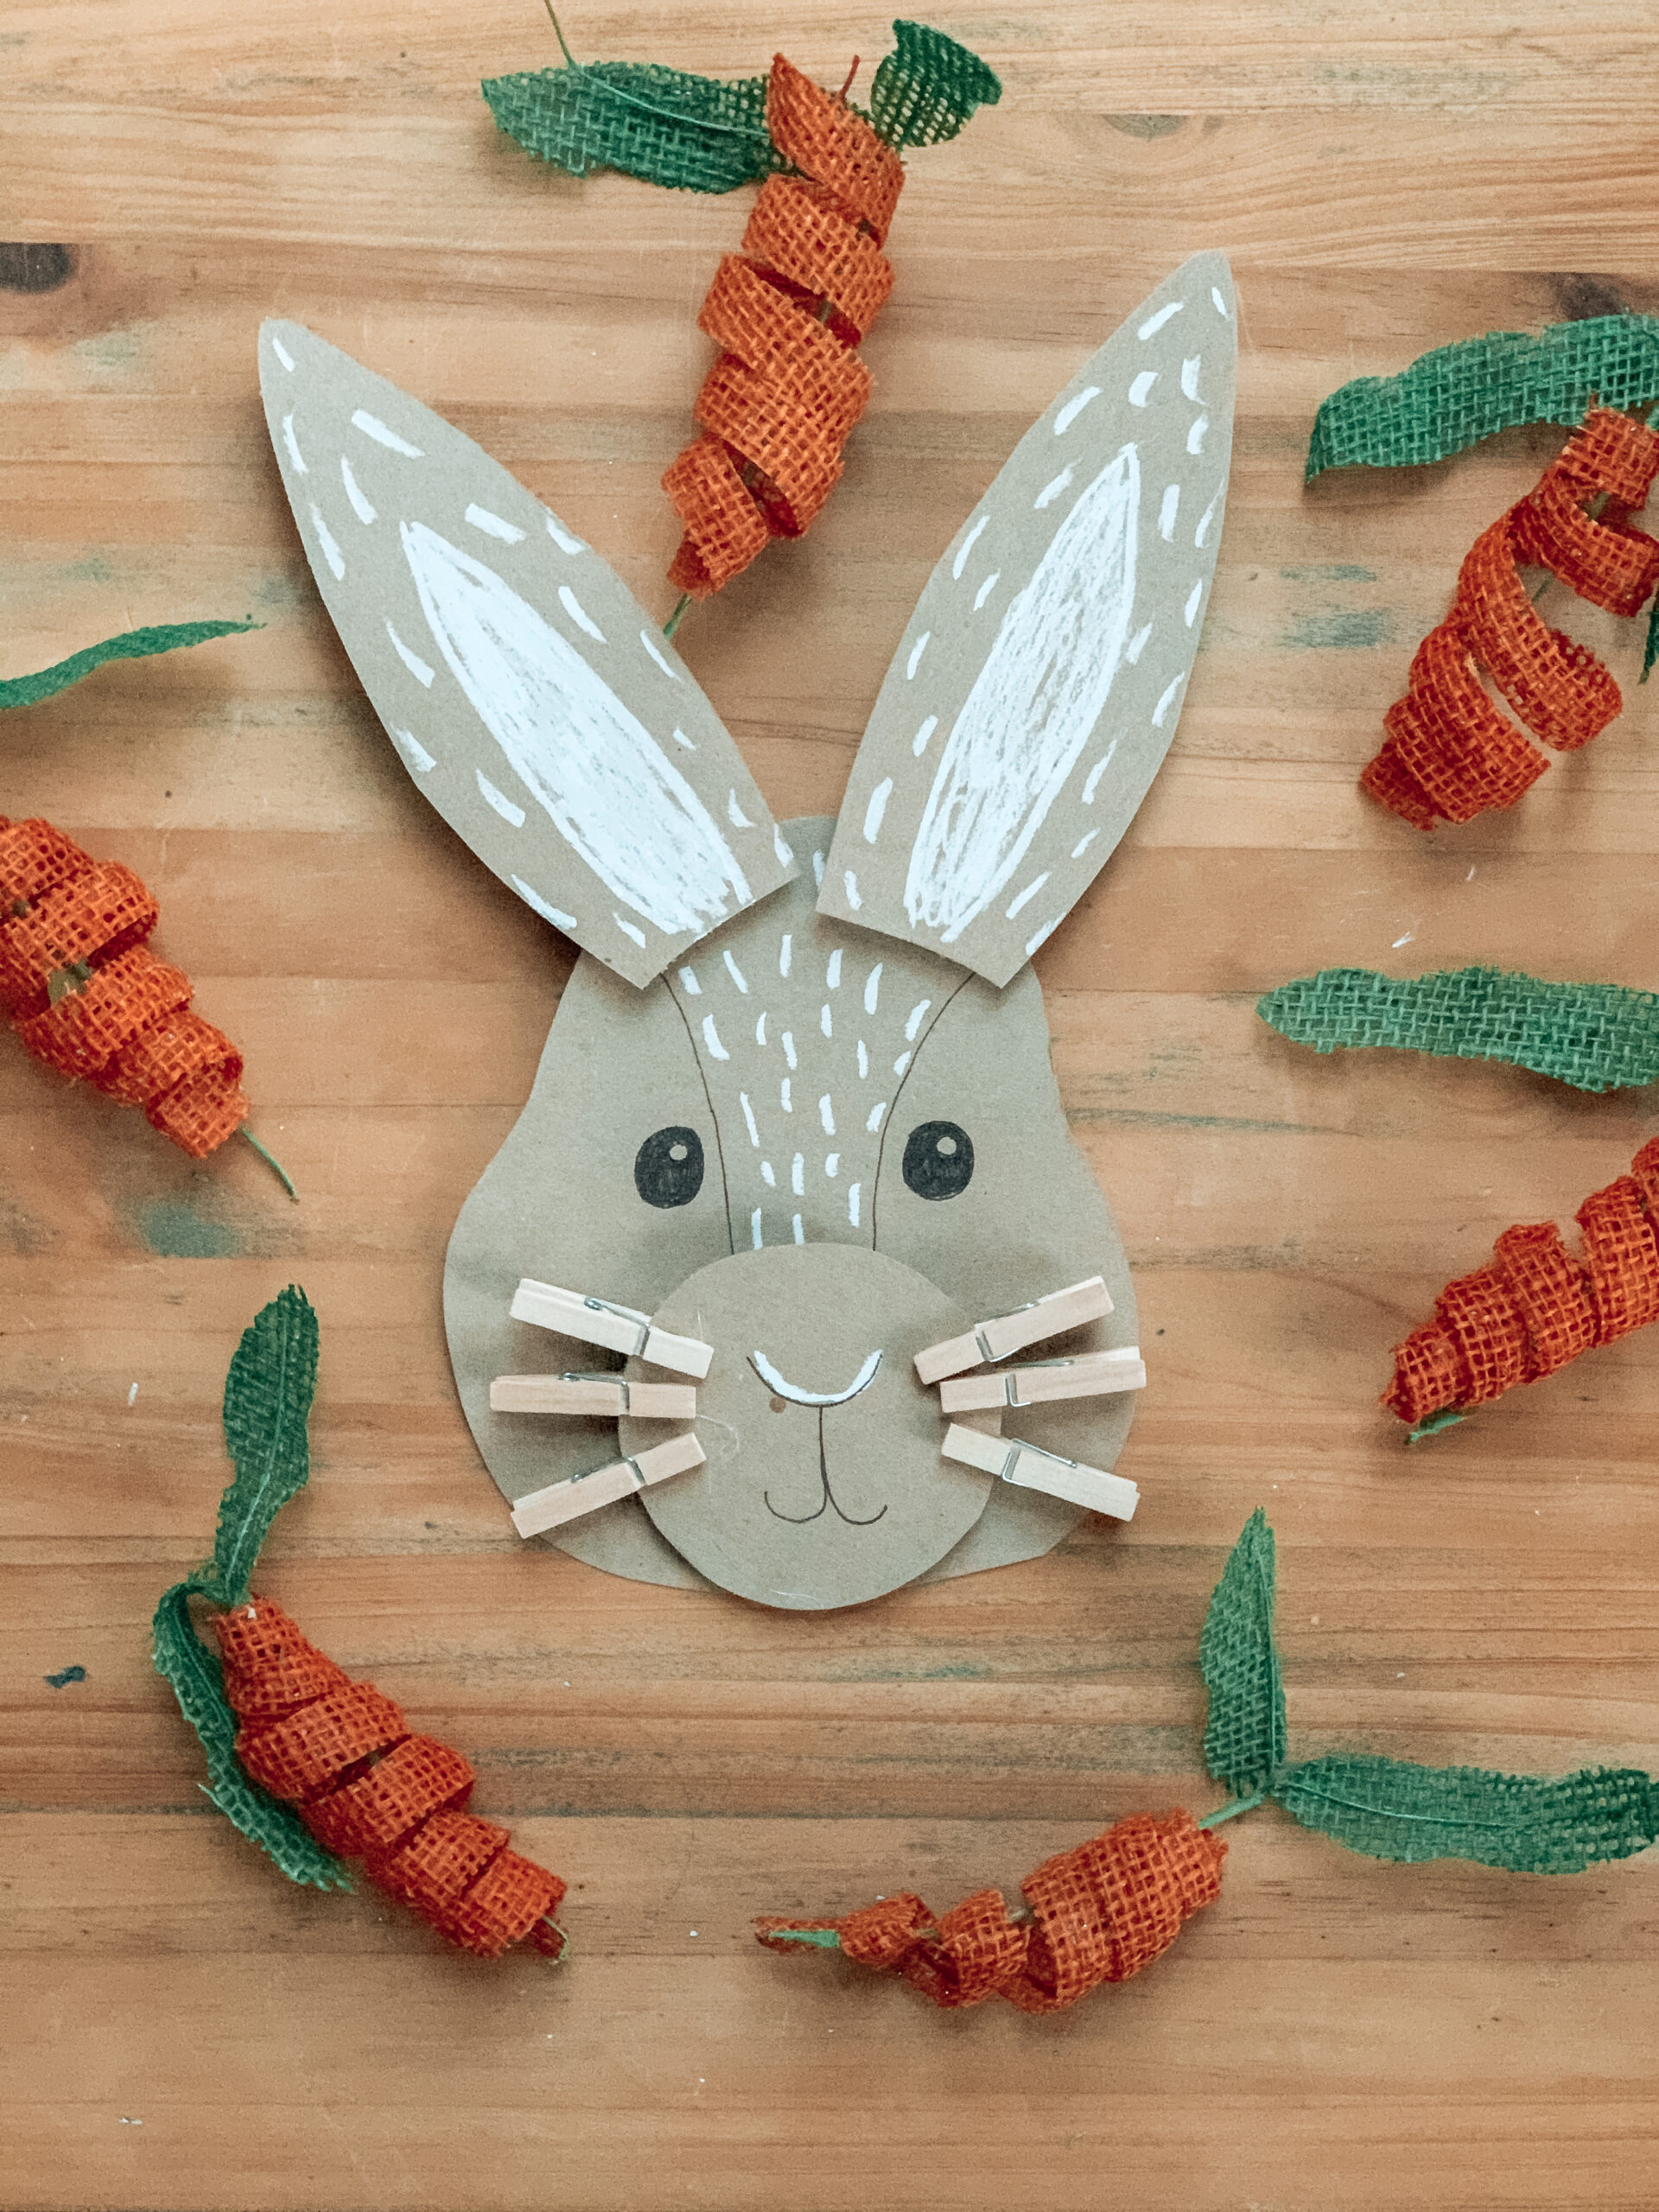
Next, I hot glued the rectangular block to the circle nose cutout and then glued all of that to the face cutout.
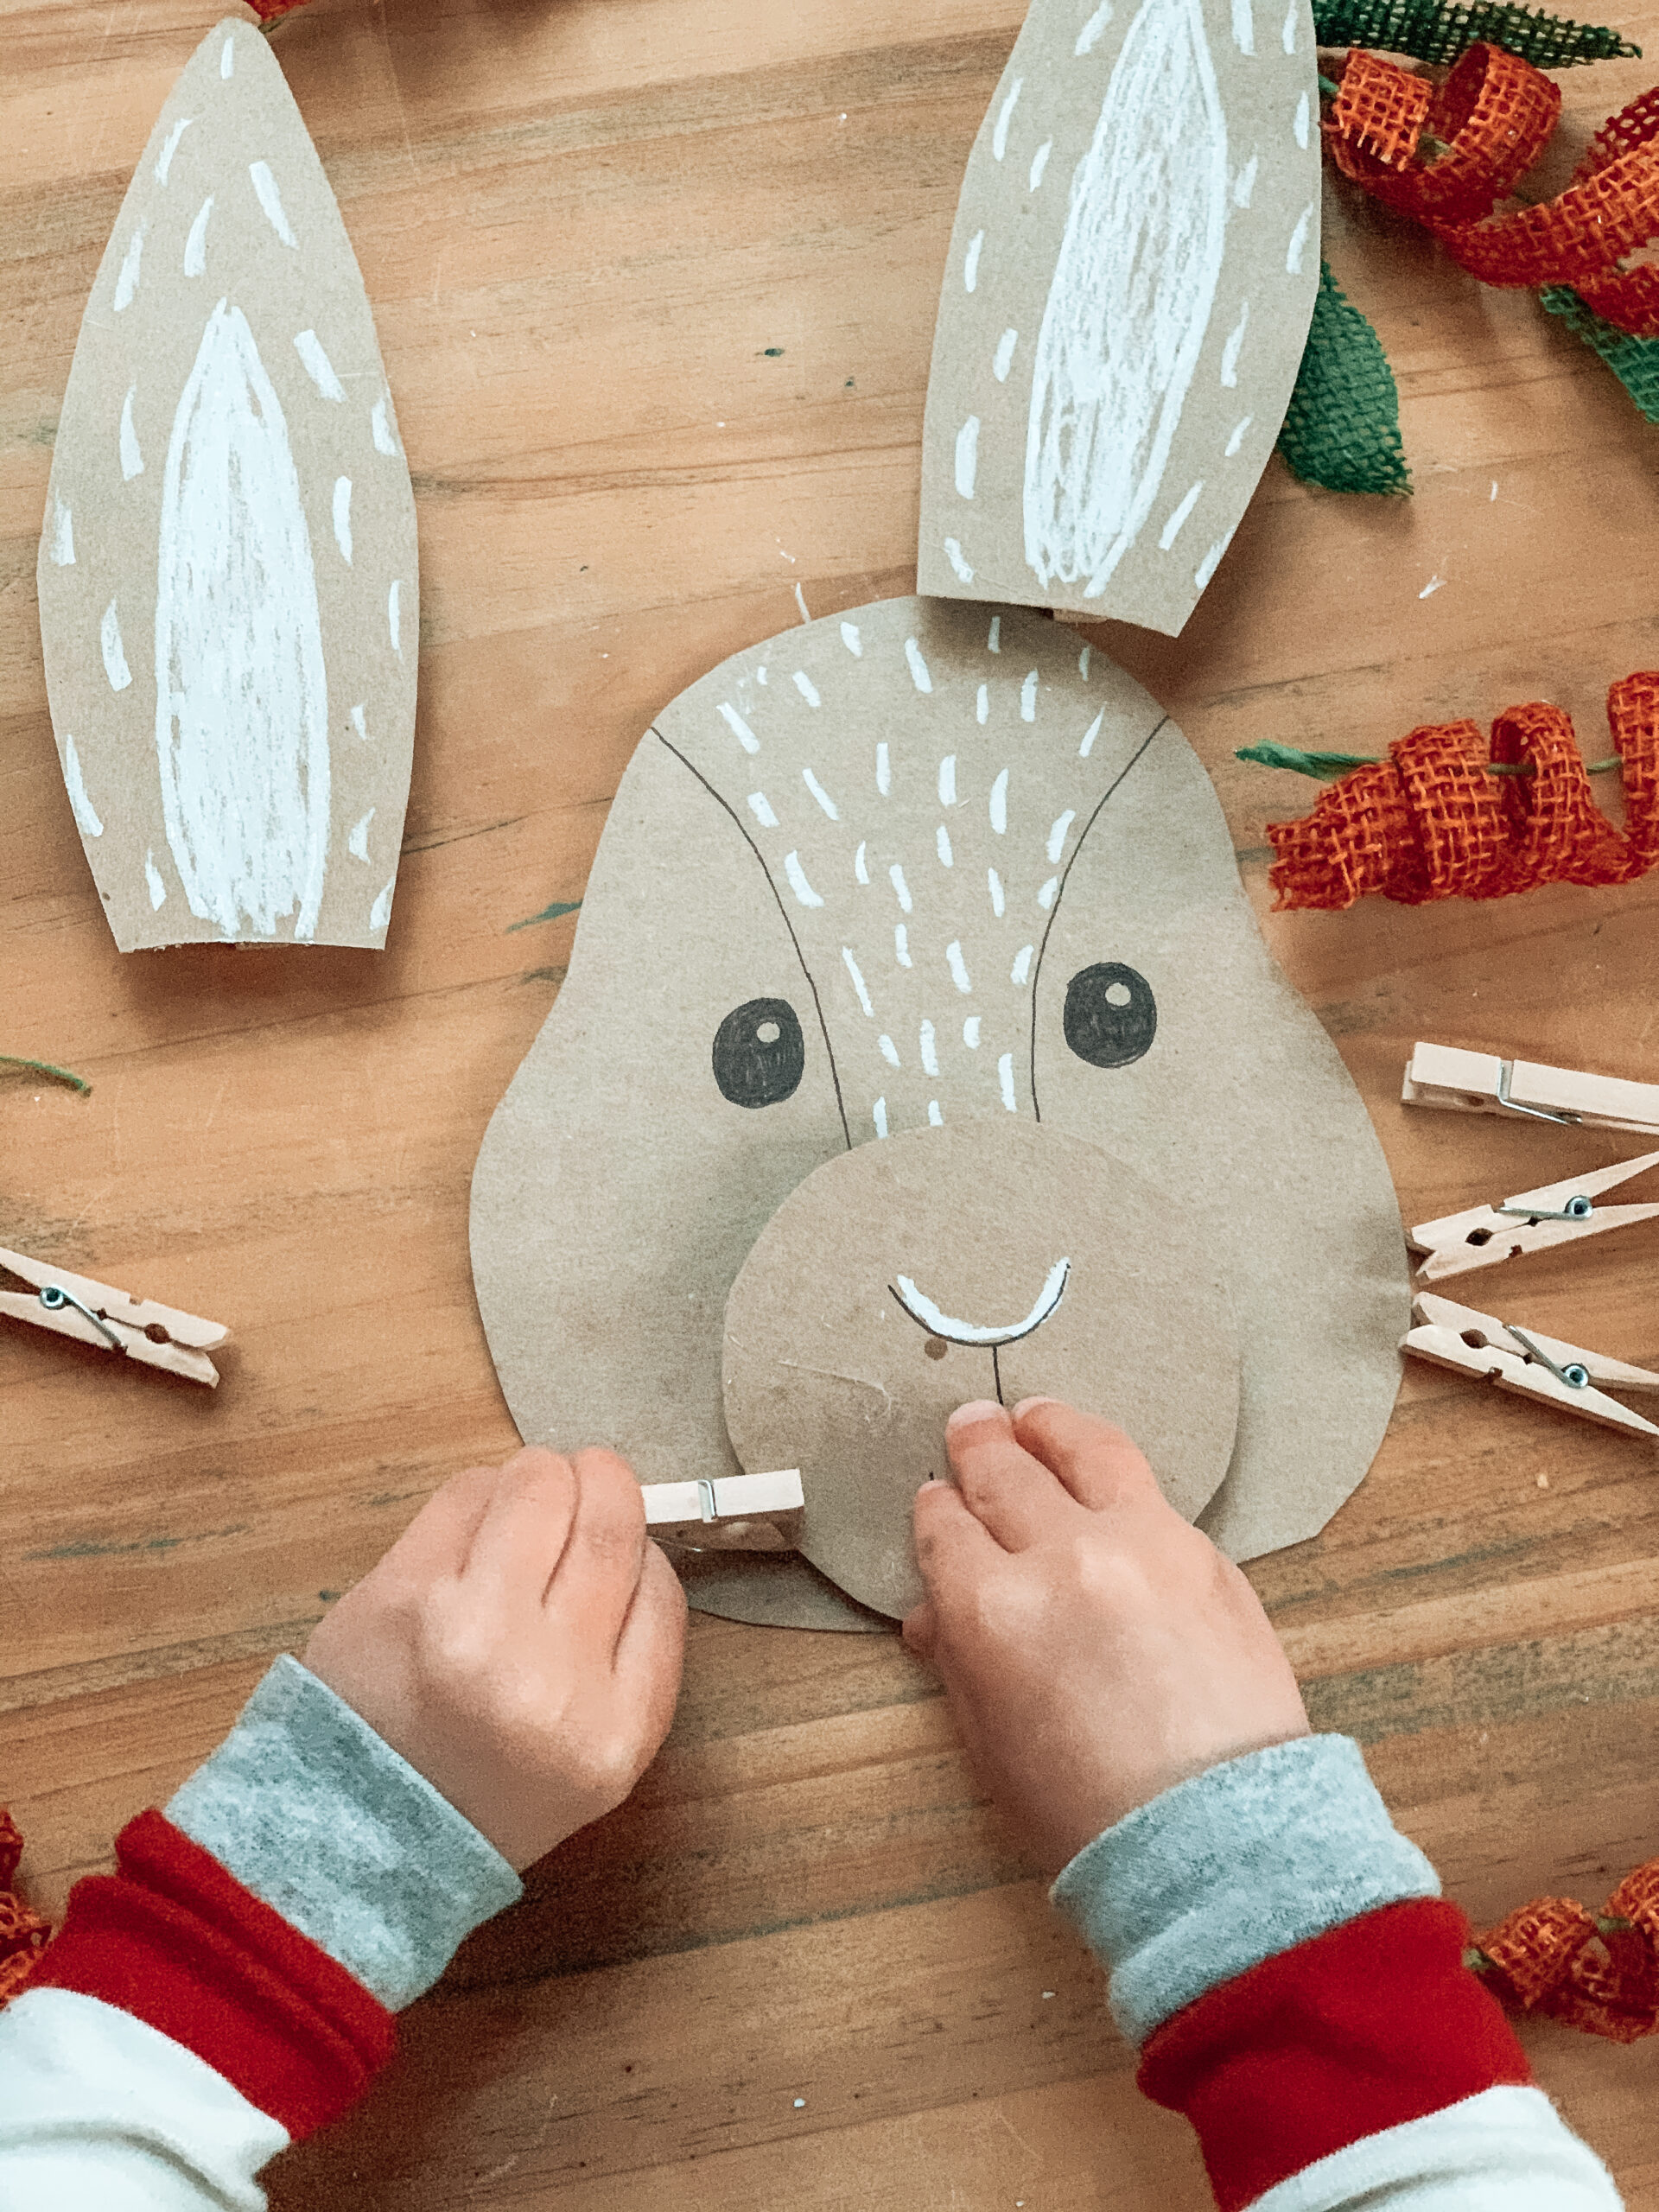
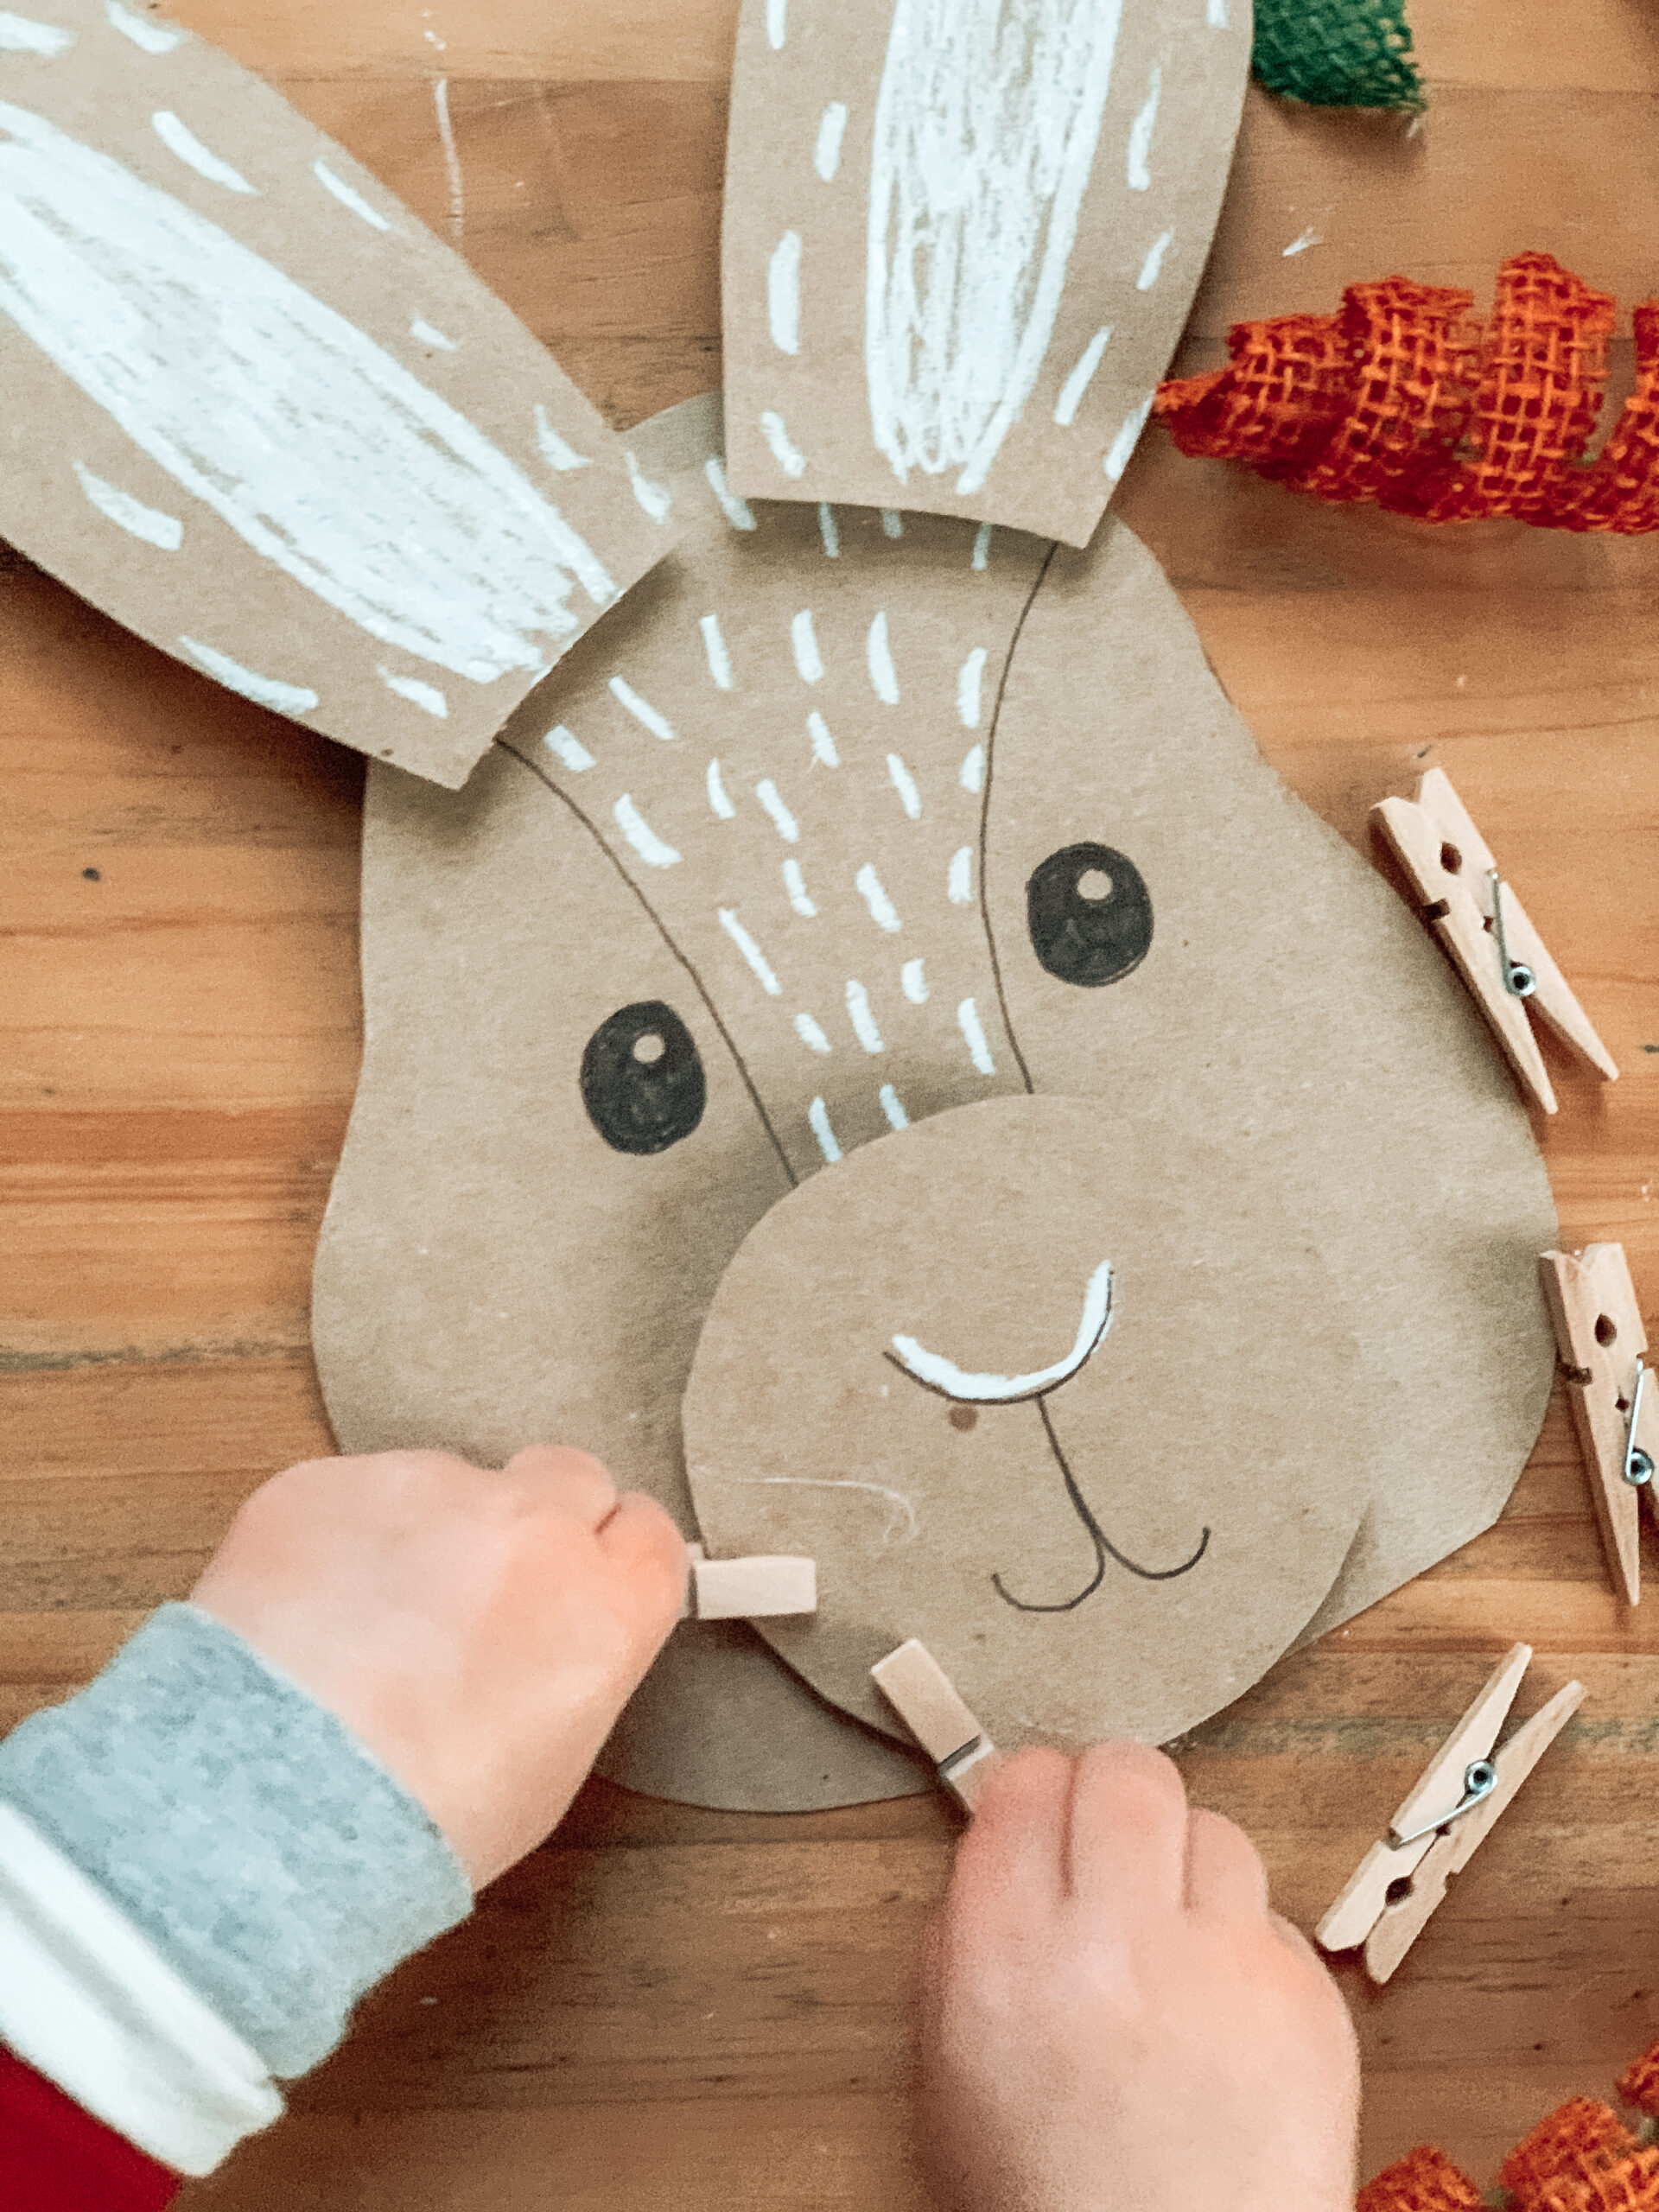
Finally, I hot glued one clothes pin to the back of each ear. This allows for your child to be able to clip on and remove the ears for added fun.
How To Play:
Have your child clip the ears on and off of the bunny. Next, they can add and remove the clothespin whiskers. To add more of a learning challenge, have your child count the whiskers as the clip them on and take them off.
What You Will Need:
cardboard (I used a cereal box), scissors, hot glue gun, clothes pins, black sharpie pen, white chalk marker
Directions:
- Cut out shapes needed: two ears, face, circle for nose, and a small rectangle
- Fold the small rectangle like an accordion. Glue each fold together, creating a rectangular block (this will be used to prop up the nose.
- Use the sharpie pen and chalk marker to decorate the details of the bunny
- Glue the rectangular block to the circle nose. Then glue that to the face cutout
- Glue clothespins to the back of the ears (one clothespin per ear)
- Your bunny is ready to play with! Have your child clip the ears and whiskers on and off the bunny.
Inspired by: Our Beautiful Breath Of Life